If you can believe it, we managed to stave off the Rainbow Loom craze until this past Summer. In search of road trip activities that my son could work on while we took the 8+ hour drive to Tucson, I found an awesome, completely portable Monster Tail kit by Rainbow Loom. While my son has been involved with trading and even making bracelets with his friends, he never really wanted a loom until this one, since the “monster” in the title screams boy! One of the main draws that compelled me to purchase 2 kits over the summer for my kids was the price. For only $6.54 at Walmart, you’ll get the Monster Tail Loom, Hook, and enough rubber bands and C-clips to make plenty of bracelets.
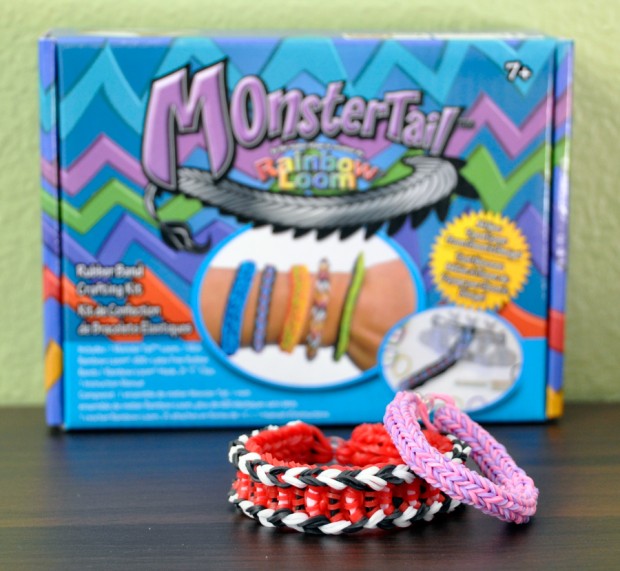
The Monster Tail loom is a smaller, more portable loom that still offers a lot of creativity (and is for both boys and girls!). Not having any experience with the original Rainbow Loom, I started with the one of the project tutorials included in the kit. The first bracelet we created was a 2-color Criss-Cross Quadfish Bracelet using my daughter’s favorite colors: Purple and Pink. Since I am a very visual person, I found that watching video tutorials on Rainbow Loom’s YouTube Channel was very helpful, particularly when “finishing” the bracelet.

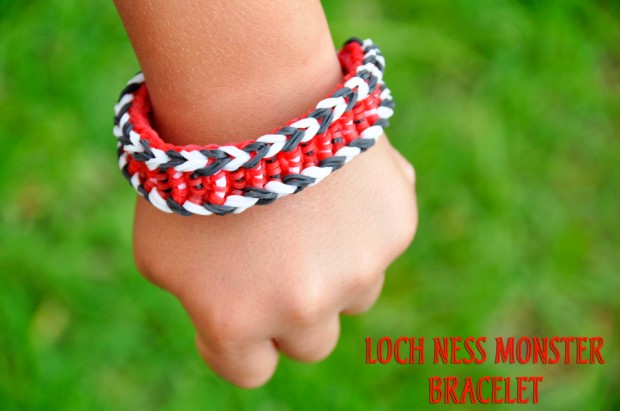
Once we “mastered” that bracelet, it was time to put our creativity to the test. My son wanted a “chunkier,” more boyish bracelet so we perused their channel and found this awesome Loch Ness Monster Bracelet. The neat thing about this bracelet is that it is completely reversible! And, because it’s thicker than most Rainbow Loom bracelets, it fits my son’s all-boy style. Since I found it very difficult to find the instructions online, I thought I’d share a visual step-by-step tutorial based on the video we watched.
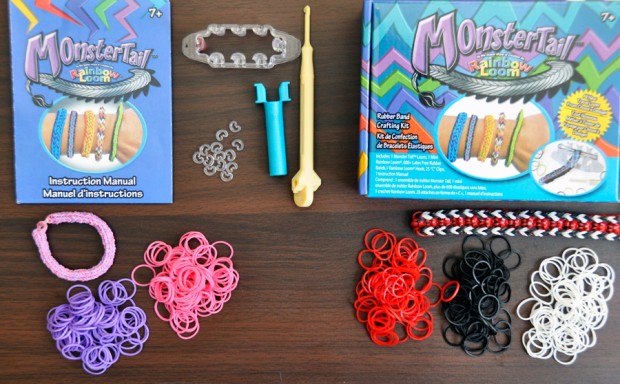
Here is what you’ll need for the Monster Tail Loch Ness Monster Bracelet:
- 90 “A” colored bands, 30 “B” colored bands and 30 “C” colored bands (we used red, black, and white)
- Monster Tail Loom
- Rainbow Loom Hook
- C-clip
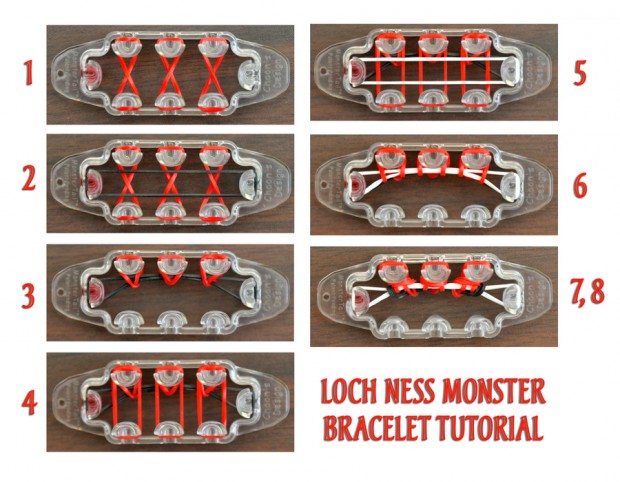
Loch Ness Monster Bracelet Tutorial
- Begin by placing 3 “A” or red colored bands vertically on the loom in 3 figure eight patterns
- Place 2 “B” or black colored bands lengthwise across the loom
- Using the hook, stretch the 3 “A” colored bands from the bottom half of the loom to the top half of the loom
- Place 3 “A” colored bands vertically on the loom (do not twist into a figure eight pattern)
- Stretch 2 “C” colored bands lengthwise across the loom
- Lift 3 “A” colored bands from the bottom half of the loom to the top half of the loom
- Lift bottom 2 “A” colored bands up and over each of the 3 middle pins.
- On each end of the loom, lift bottom 2 bands up and over the pin. (You will alternate between “B” and “C” colored bands)
- Continue this step process until the desired length of the bracelet is achieved (wrap around wrist and continue working until the top of the pins reach the end of the bracelet)
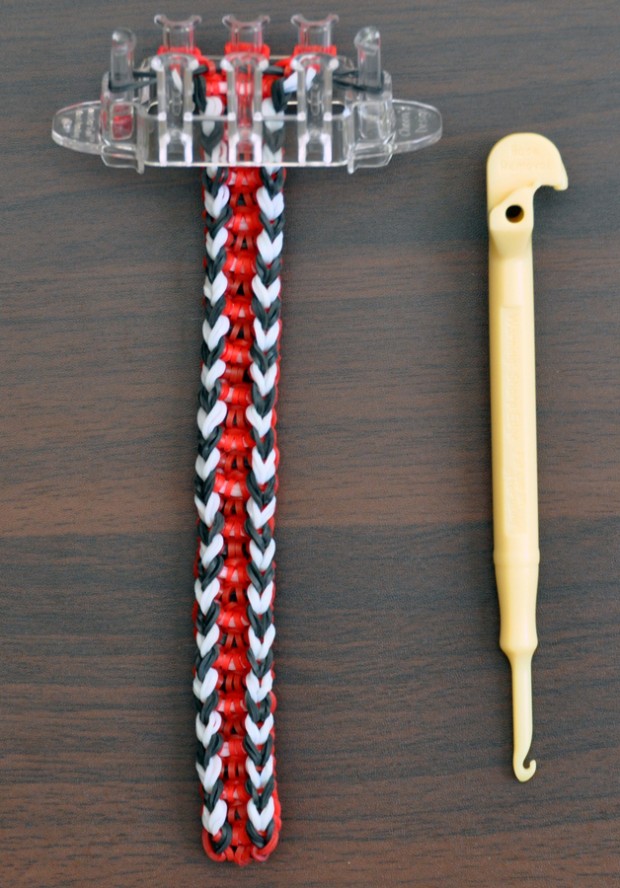
To Finish the Bracelet:
- Place last 5 bands on the bracelet, using only the “A” colored bands
- Lift the bands in the same order as you did in the above steps
- Move the 2 end bands to the pin next door (Make sure your hook is facing outwards or away from you)
- On the 2 outside pins, lift the bottom 2 bands up and over (do not lift the bands on the middle pin)
- Move the 2 outside bands to the middle pin (make sure you face the hook outwards and grab both bands). You should have 6 pins on the middle pin.
- Lift bottom 2 bands up and over
- Attach the C-clip around all 4 bands
- Lift the bracelet off the loom
- At the opposite end of the bracelet, slide your hook through the “A” colored bands and attach the C-clip
Rainbow Loom’s video (7:09) is very helpful in visualizing the process of ending the bracelet.
I had no idea prior to purchasing these kits just how addicting (and therapeutic) it is to make these bracelets. I found myself spending way too much time online trying to see what other creative ideas we could endeavor. While I’m definitely not at this level, if you do a quick Google search, you’ll see everything from purses and hats to hair bows and sandals! The inventive ways people are using Rainbow Loom is impressive.
While I won’t say that I’m an expert, these tips will help ensure your bracelets look beautiful!
- While working on the loom, be sure to keep it positioned so that the red mark is always on the left side
- Download Rainbow Loom’s free Band Organizer
- Try if possible, to finish your bracelet in one sitting (this will prevent confusion as to which step you last completed)
- While working, be sure to push the bands down during each sequence and ensure the bands are straight and untwisted as this will show in your completed design
Once I got the sequence down, I was able to complete bracelets in less than 30 minutes, particularly the easier patterns. With my help, my son has been able to complete simple patterns which has been very rewarding for him. As a parent, I love that these projects help improve his fine motor skills, inspire creativity, and allows him time to focus his attention on completing a project. And, with the the new school year upon us, I’m certain my son will be trading these bracelets daily which is a great way to continue developing his social skills.
Pick up your Monster Tail Loom Kit by Rainbow Loom at your local Walmart.
- Discover Luxury at Sonesta Irvine: Your Ideal Staycation - August 8, 2024
- CHOC Walk Returns to the Disneyland Resort – Special Events and Ways to Support - June 28, 2023
- Beastly Ball Returns to the Los Angeles Zoo - May 8, 2023


I’m a Grandmother and I just got interested in this Rainbow loom, having lots of FUN. But where can I get this small/traveling loom? Oct./17, Ont., 🇨🇦
Hi
Hi. Do you have monster tail loom bracelet
Great post. thanks for sharing, will surely try..
I also found a unique website that offers personalized portraits for babies and children. If you want a gift for your child or love once. Try them out!