{Sponsored}
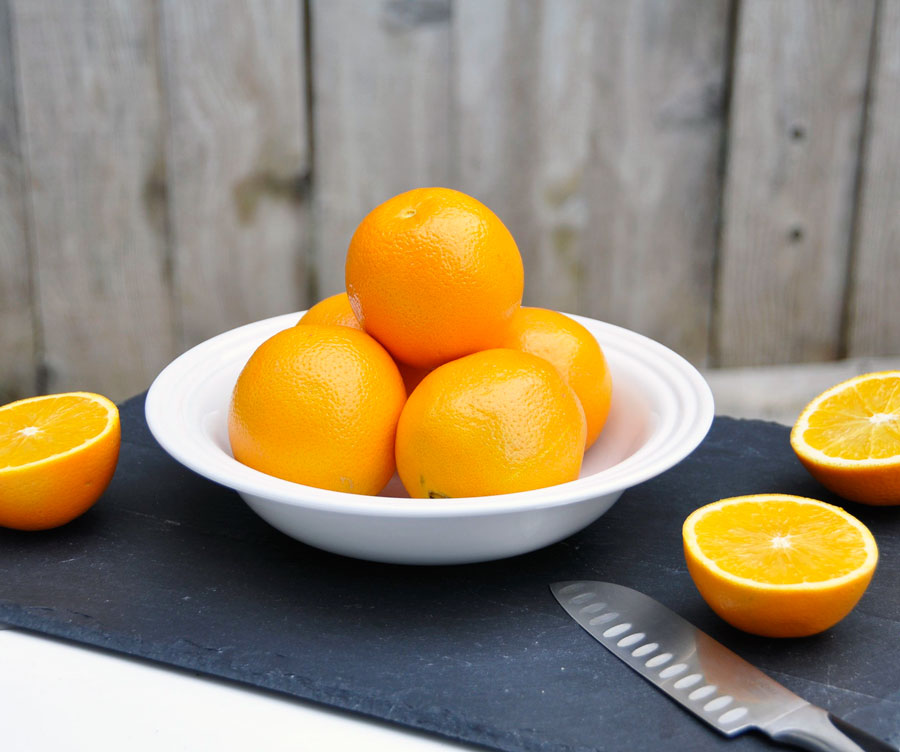
One of the steps we’ve made towards living a healthier lifestyle is to take a more seasonal approach to our produce shopping. Because we live in Southern California, we typically have access to most fruits and vegetables, but I’ve been trying to become more aware of those fruits and vegetables that are in season during certain times of the year. Our local Walmart does a great job of showcasing those items by having a substantial supply and showcasing them towards the front of the produce section. Right now, we’re in the heart of the Citrus Season which is a favorite in our family, so I picked up a bag of juicy Navel Oranges and started dreaming of exciting recipes.
You likely know the benefits of eating fresh fruits and vegetables, which serve as a natural source of vitamins, minerals, and fiber. But why buy seasonal produce?
Very often, season fruits and vegetables are locally grown, which makes them less expensive, more nutritious (the produce hasn’t had to travel as far), and more flavorful. Buying seasonal produce not only helps to sustain our economy by supporting local farmers, it also helps protect our environment by reducing the amount of resources needed to get those fruits and vegetables to your store. Our family can tend to buy the same fruits and vegetables over and over again, but with our seasonal approach, we diversify our palate and reap the benefit of diverse nutrients found in those foods.

We are a citrus-loving family and it isn’t uncommon for our children to go through a bag of Clementines in one week. When I picked up the bag of Navel Oranges from my local Walmart, my daughter told me that they looked like “really big Cuties.” : ) California Navel Oranges peak during February, March, and April and can be identified by their “navel” (an opening at the blossom end). They are very easy to peel and free from seeds, which makes them the perfect snack for kids.
I have to confess, there was a time that I felt very intimidated by the process of shopping for produce. Flavor and nutrition were my top concerns, much of which can be mitigated by simply shopping seasonally. I’ve also started reading up on the most common produce available in my area. For example, you can find a wealth of information by simply searching for your local farmer’s website (sometimes this information can be readily found on the produce’s sticker or bag).
How to pick navel oranges
According to family-owned farm Produce Pete, look for oranges that are shiny and heavy in your hand. Navel oranges should also smell sweet. Avoid oranges that are spotted, shriveled, or have visible white patches on the rind.
How to store navel oranges
If you plan to eat the oranges immediately, they’ll keep at room temperature for 3-4 days. I like to refrigerate most of my produce and very often this will extend their shelf life. Store them in a plastic bag or the crisper drawer and they will keep for 1-2 weeks.
Speaking of quality and shelf life, remember that Walmart offers a 100% freshness guarantee. If you are not completely satisfied with the produce you’ve purchased, simply bring back your receipt (no need to bring back the produce) to your local store and you’ll receive a refund without any questions asked.

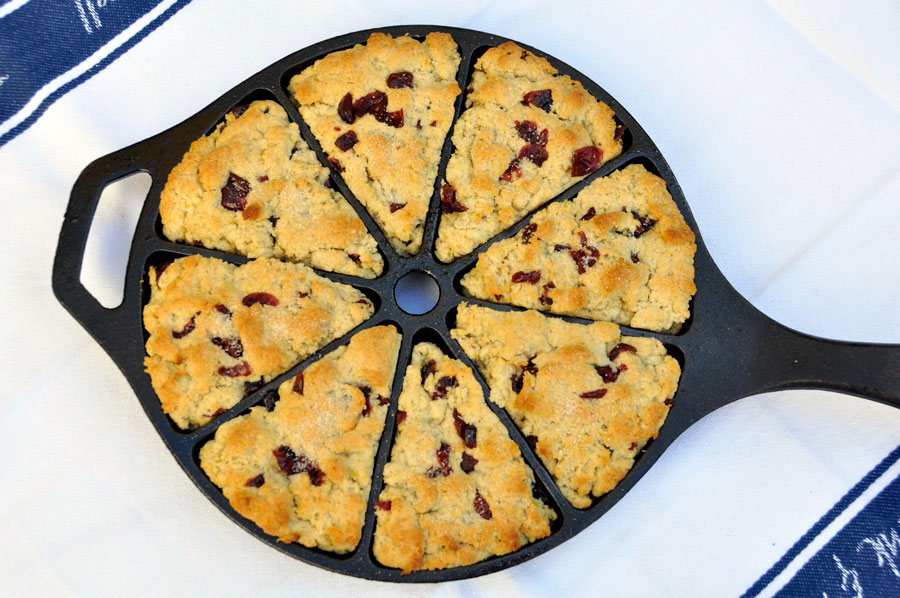
My kids absolutely love citrus fruits, so I had to hide a few of them in order to make these delicious Gluten Free Cranberry Orange Scones. I love to bake ,and when you combine that with my love for breakfast breads, the result is likely something sweet and delicious. I’ve been experimenting with some allergy-friendly recipes over the past few weeks, and while I’ve gone back and forth with eliminating gluten from my diet, I’m still not ready to make that change. Both my aunt and my mother-in-law suffer from Celiac disease, so from time to time I’ll experiment with a recipe that I can make or share with them when they come to visit.
Gluten-free baking is notoriously difficult, given the fact that gluten is what holds cakes, muffins, and other quick breads together. Our local Walmart has a dedicated Gluten-Free section and I was able to pick up all of my ingredients for these muffins, including Xanthum Gum and Gluten-Free Baking Mix to make these delicious scones. Baking is truly a science and I’m definitely not an expert, which is why I recommend starting with a “mix” if you haven’t endeavored to make gluten-free breads.

- 2 cups gluten-free flour mix I used a blend by Gluten Free Cafe
- 1/4 tsp salt
- 1/4 tsp baking soda
- 1 tablespoon baking powder
- 1/4 tsp xanthum gum
- 1/4 tsp allspice
- 1/3 cup sugar
- 1/2 cup dried cranberries chopped
- 1 orange zested
- 6 tablespoons butter cut into pieces
- 1/2 cup plus 1 tablespoon heavy cream
- 2 tablespoons freshly squeezed orange juice
- 1 egg
- 1 tsp vanilla extract
- 1/2 tsp orange extract optional
-
Preheat oven to 425 degrees F
-
In a medium-sized bowl, mix gluten-free baking mix, salt, baking soda, baking powder, xanthum gum, allspice, and sugar until well combined
-
Using a food processor, cut the chilled butter into the flour mix
-
Transfer mixture back to bowl and add orange zest and dried cranberries
-
In a separate bowl, whisk cream, orange juice, egg, and extracts together
-
Add mixture to dry ingredients and mix just until combined (do not over-mix)
-
Roll out dough into a circle, then cut into triangles (I use a cast-iron scone pan)
-
Freeze dough for approximately 10 minutes
-
Before baking, brush scones with cream and sprinkle sugar over the top of each one
-
Bake scones at 425 degrees F for approximately 8 to 10 minutes until golden brown (don't overcook)
-
Serve with fresh whipped cream and orange curd
I’ve been making scones for years and have always used the same recipe, so I wasn’t sure how these would compare. But the result was actually quite delicious. I loved the combination of orange and cranberries and I still found these scones to be light in texture, yet rich in flavor. Here are some of my best tips for making Gluten Free Cranberry Orange Scones:
- Look for a gluten-free flour blend. My local Walmart offers 3 different gluten-free flour blends from Gluten Free Cafe, Bob’s Red Mill, and King Arthur Flour. Once you feel comfortable baking with gluten free flours, try making your own using a mix of rice, sorghum, and/or almond flours.
- If your flour mix contains xanthum gum, omit it from the recipe. Xanthum gum is what will keep the bread together (as opposed to a pile of crumbs) but if you use too much, the result will be chewy scones (and we can’t have that!).
- Since the type of flour you use may vary, remember that you can add a touch of cream if the dough is too sticky or gluten-free flour (1 tablespoon at at a time) if the dough is too dry.
- Invest in a cast iron scone pan. I absolutely love my cast iron pans because they retain and distribute heat evenly and effectively and they last forever. Your local Walmart will likely have one and they retail between $20 and $30.
Later this week, I’ll show you an easy way to make Orange Curd with fresh squeezed orange juice, egg yolks, sugar, and butter!
What are your favorite citrus recipes? I’d love to share them in the comments section below!
- Discover Luxury at Sonesta Irvine: Your Ideal Staycation - August 8, 2024
- CHOC Walk Returns to the Disneyland Resort – Special Events and Ways to Support - June 28, 2023
- Beastly Ball Returns to the Los Angeles Zoo - May 8, 2023


Leave a Reply