School is almost out, which means our family is gearing up for a summer filled with adventures both near and far. Along with the excitement of swim lessons, trips to our favorite amusement park, a family vacation, and summer camp we also built in lots of down-time. We can’t wait to lounge at the beach, cool down with a new summer flick, and get our craft on. And speaking of crafting, there will be lots of fun, easy projects to continue inspiring creativity within my kids.

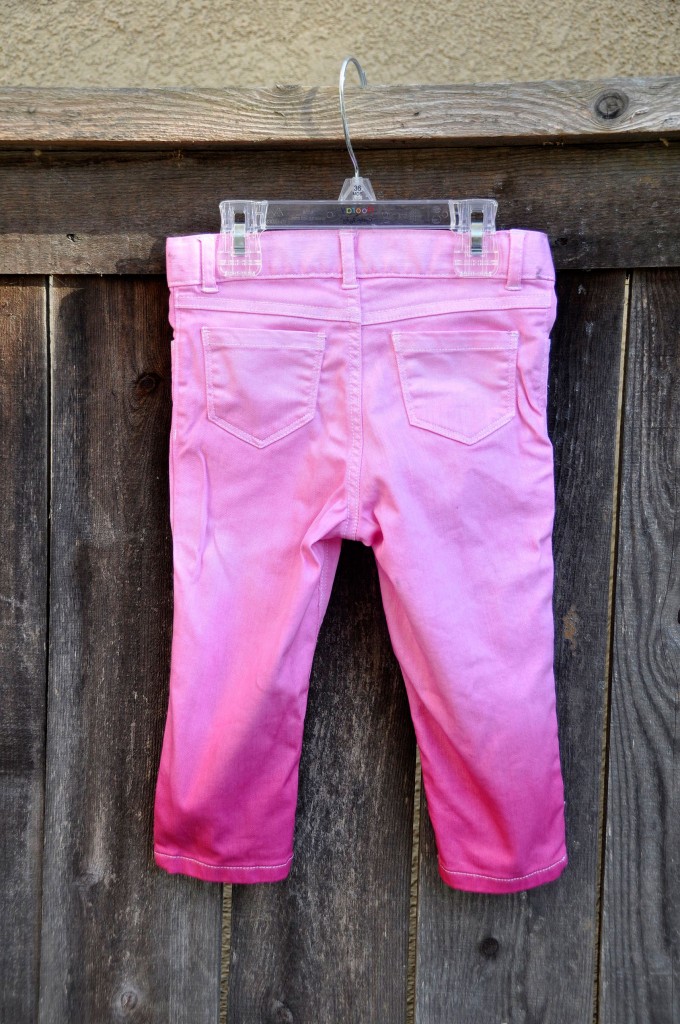
A couple of weeks ago, I attempted my very first DIY (Dye-It-Yourself) project with Rit Dye. I loved how my daughter’s Dip-Dyed Hair Clips turned out, so I decided to get a bit adventurous and attempt another project. A few of the mom bloggers who completed DIY projects used an Ombré Dyeing technique found on the brand’s website, so I decided to purchase an inexpensive pair of white jeans for my daughter and have a go at it!
What is Ombré?
This fancy French word simply means “to shade” and is usually achieved by dip-dying a fabric so that the colors fade from light to dark. There are so many different ways to dye fabrics using this technique, but I decided to keep it simple and use one color (complimentary colors can be used but I like the monochromatic look I found on Rit Dye’s website). While the effect is actually quite dramatic and sophisticated, the project is easier than you might expect.
Ombré Dip-Dyed Jeans
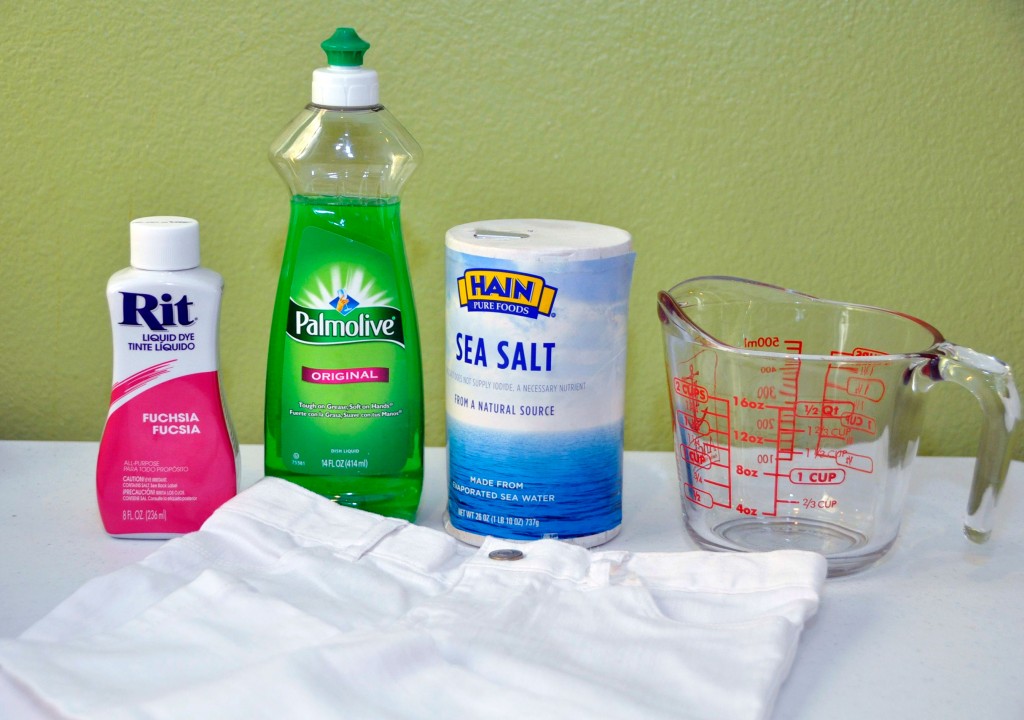
Here is what you’ll need for this DIY project:

- Rit Dye in the color of your choice
- Glass Measuring Cup
- 3 Gallon Bucket
- Metal Spoon
- Gloves
- Salt
- Dishwashing liquid
- Plastic cover (to protect surfaces in the event dye is splattered or spilled)
1. Machine wash your garment to help the fabric absorb the dye.
2. Combine 1/2 cup liquid dye, 1 cup salt, and 4 cups of very hot water (I boiled mine in a tea kettle) and stir well.
3. Pour dye solution into the bucket and add 1 gallon of very hot water plus a squirt of liquid detergent and stir well (note, this varies from the original instructions on the website).
4. Wet garment, squeeze out excess water, and immerse the lower third of the jeans into the dye bath for 10 minutes.
5. Move the jeans back and forth, up and down, so that they absorb the dye evenly.
6. Dip the second section into the dye bath for 5 minutes, again moving it back and forth, up and down. At this point, you’ll want to keep an eye on the color so you achieve your desired shade.
7. With gloves on, dip the remaining fabric in the dye bath quickly. If you leave it in too long, you won’t see the same shading effect.
8. Ring out excess dye and run the jeans under cold water until it runs clear. Be sure to hold the jeans with the lightest color at the top so that the dye runs down towards the darker section.
9. Machine wash and line dry.
I absolutely loved how these jeans turned out and it was easier than I anticipated. A few things to note when working with Rit Dye:
1. It’s messy. Despite my best attempts to avoid splashes and spills, it happens. Be sure to cover your work surface and use gloves.
2. Be sure to use enough dye. If you are not sure, refer to Rit Dye’s website which suggests 1/2 bottle of liquid Rit Dye for every pound of dry fabric.
3. If you want a deeper color, leave the garment in the dye longer. Dark or bright colors may require doubling the amount of dye used.
4. Adding salt to the dye bath intensifies the color and liquid detergent ensures even dyeing.
For additional dyeing projects, visit Rit Dye!
No compensation was received for this post.
Images: Rockin’ Mama.
DIY Project Inspired by Rit Dye.
- Discover Luxury at Sonesta Irvine: Your Ideal Staycation - August 8, 2024
- CHOC Walk Returns to the Disneyland Resort – Special Events and Ways to Support - June 28, 2023
- Beastly Ball Returns to the Los Angeles Zoo - May 8, 2023

Leave a Reply