{Sponsored}
The weeks leading up to Christmas are one of the most exciting times in our home. If I’m not baking up holiday treats with my kids or helping them with a simple craft, we’re out exploring our city and all of the joy and merriment that surrounds us. Naturally, my kids have been talking non-stop about their wish lists. But lately, they’ve also had a pressing matter on their minds…Christmas decorations! I have always strived to make every holiday and celebration memorable, but Christmas is the time of year when I really try to go all out. Right after Thanksgiving, we’ll set up our Christmas tree and begin readying our home for the celebrations and gatherings that will ensue.

Since food is an integral part of any holiday celebration, I thought I’d put together a festive table centerpiece that illuminates the spirit of Christmas. The table is where many families spend time together during this season so it was important to me that the centerpiece be impressive enough to stand out without being overly distracting.
During my visit with Walmart last month, we had an opportunity to glean some inspiration from Better Homes & Gardens, and along with presenting an expansive display of easy gift baskets, they showed us how easy it is to put together spectacular centerpieces at a price you can afford.
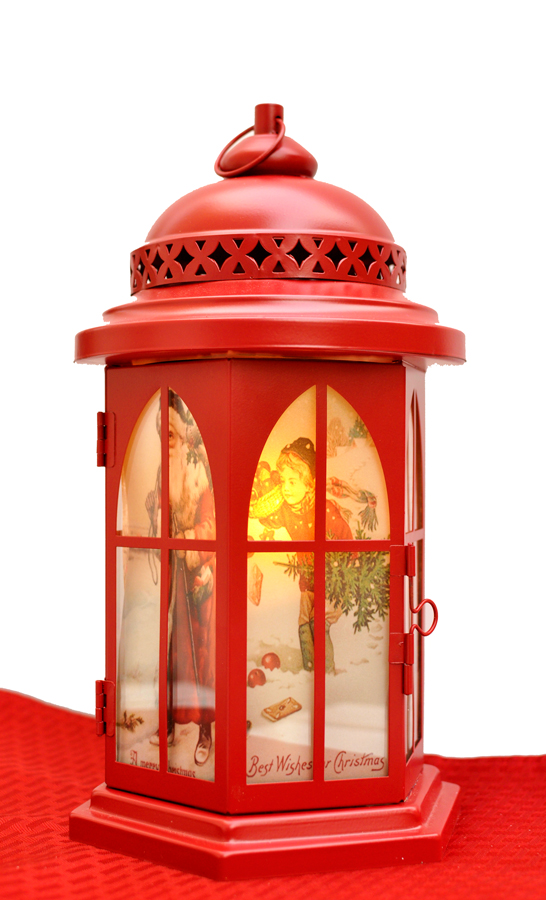
Nearly all of the ideas presented were “outside of the box” and included everything from using a picture frame as the “base” of the centerpiece to making frost-covered twigs with Epsom Salts and Modge Podge. My favorite centerpiece was a Vintage Christmas Lantern that I almost couldn’t believe had been handmade. Despite it’s elegance, the project is relatively simple to complete. Everything you’ll need to complete this project can be found at your local Walmart.

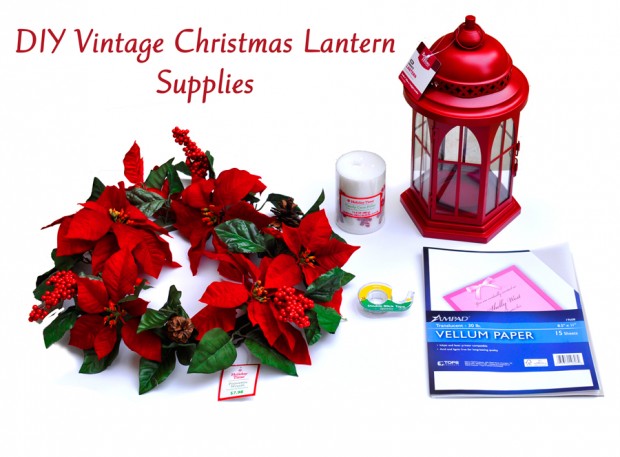
Supplies:
- Better Homes and Gardens Red Ornate Lantern
- Vellum Paper
- Double-Sided Tape
- Paper Trimmer
- LED Candle
- Poinsettia Wreath
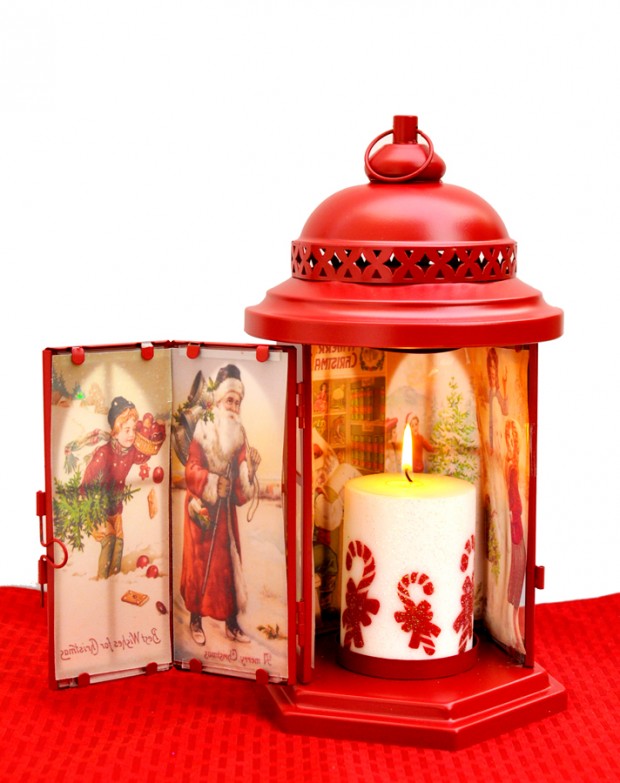
1. Print vintage Christmas photos on vellum paper (be sure to take note of any copyright license). You can “Google” vintage Christmas and find an expansive selection of photos.
2. Measure the glass on each side of the lantern and use a paper trimmer to cut each photo to fit the glass.
3. Use double-sided tape to secure one photo per window.
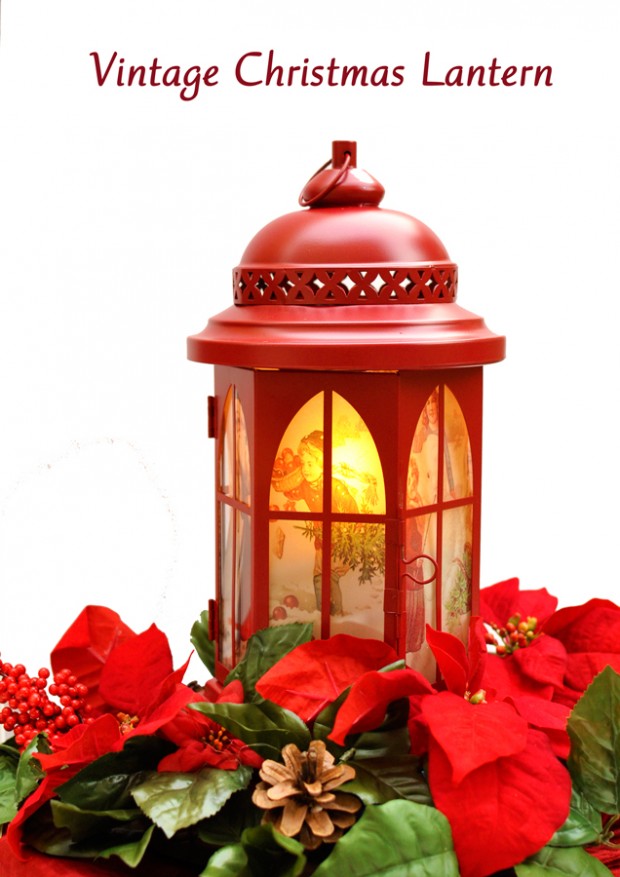
4. Display lantern surrounded by the wreath
5. Place a 4-inch pillar LED candle inside the lantern (I experimented with a traditional candle but was concerned it might ignite the vellum paper)

This project is relatively easy to recreate, considering how stunning the result is. Because it is so easy, you can experiment with the types of photos you display inside the lantern, or change them out whenever you desire. You can also opt to print the photos in black and white or sepia, depending on the look you are aspiring towards.

To maintain consistency with the vintage look, the representative from Better Homes and Gardens displayed the lantern on a small stack of books, however, I wanted a more festive Christmas motif so I used a poinsettia wreath.
Looking for easy DIY gifts and projects you can make this Holiday season? Check out these inspired ideas from my fellow Walmart Moms:
Thanksgiving Table Centerpiece
![]()
- Discover Luxury at Sonesta Irvine: Your Ideal Staycation - August 8, 2024
- CHOC Walk Returns to the Disneyland Resort – Special Events and Ways to Support - June 28, 2023
- Beastly Ball Returns to the Los Angeles Zoo - May 8, 2023


hey I really want just the plain red ornate lantern. I saw it in the better homes and gardens magazine but i don’t know where to buy it. If you could tell me it would help alot